How to Rig Everything in Your Favor
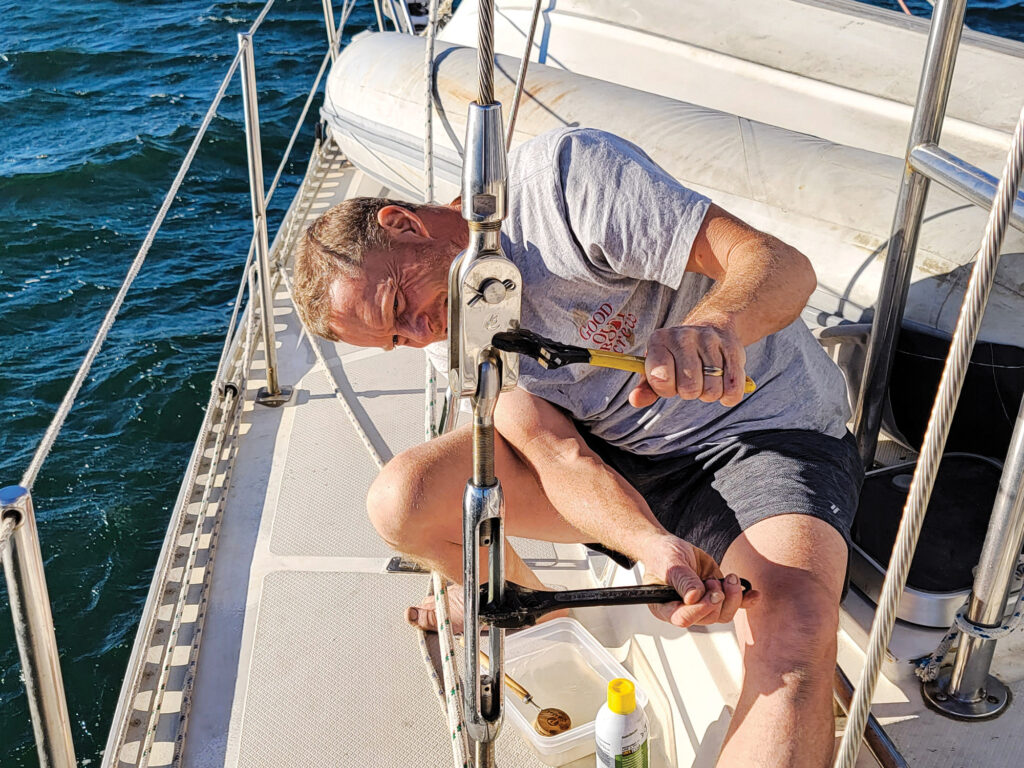 Jamie Gifford tweaks the cap-shroud tension on his Stevens 47, Totem, “on break” during a recent weeklong passage off Mexico.
Behan Gifford
Jamie Gifford tweaks the cap-shroud tension on his Stevens 47, Totem, “on break” during a recent weeklong passage off Mexico.
Behan Gifford
As sailboat races go, the first Wednesday-night race of the season was off to a cracking start. Our crew maneuvered ungracefully prestart, and we were sloppy tacking aboard the J/35, but our winter fog lifted as we beat toward the windward mark.
Then the sailing therapy abruptly ended with a crash.
As dismastings go, this one was uncomplicated. The windward cap shroud failed at the upper T fitting. What had been installed by a rigger the week before became a mess of wires, crumpled aluminum, and torn Kevlar. I was a sailmaker at the time, and my takeaway was clear: Never trust riggers.
Two decades later, I was aloft on our Stevens 47, Totem, to inspect newly fabricated and installed standing rigging. All was fine up to the second spreader, where I found several missing cotter pins. The memory of the dismasting came to mind. Our dream of sailing to the South Pacific with three young children suddenly felt riskier. We had hired the best rigger around, but the entire project was a fraught with mistakes and delays. A couple of bucks’ worth of missing parts could’ve toppled the mast, our dream and our safety.
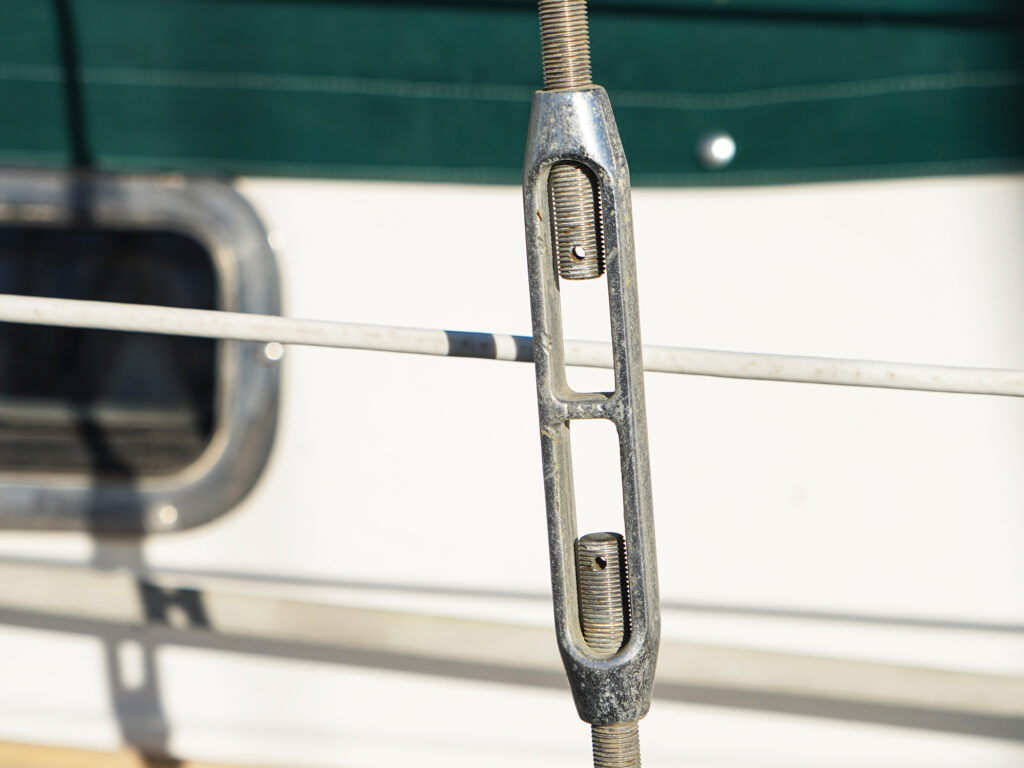 Look, ma, no cotter pins.
Behan Gifford
Look, ma, no cotter pins.
Behan Gifford
Most sailors don’t think it’s necessary to inspect a rigger’s work, just as most drivers never inspect a car’s engine before driving away from a mechanic’s repair shop. But there is a difference. If a car repair is faulty, resources are nearby. Rigging problems at sea can be complicated, and there’s not usually an expert rigger around the corner.
To prove reliability, you have to own it—really own responsibility for the condition of rigging, steering cables, through-hull fittings and more. This can feel daunting because it’s technical.
For beginners, forget about rigging terminology and engineering. Also, don’t focus on finding cracked wire strands or fittings. That’s not to say ignore them if you find them, but cracked metal is a late discovery, well past safe limits. Instead, learn to spot clues that indicate early stages of a problem.
For instance, look for rust on stainless steel and for corrosion on aluminum. Question why a line is getting harder and harder to pull. Sight up the mast while sailing to see if the mast profiles look smooth or lumpy, stable or dynamically bouncing. Look from side to side and from front to back. Note how slack the leeward shrouds are while sailing in different windspeeds. And get to the chainplate behind your bookshelf to look for water stains, especially rusty water stains that trail downward.
These are all clues to potential problems. You don’t have to know the solution, but rigging failures happen mostly because nobody identified the clues.
Rigging Inspection TipsStainless steel should be shiny with a smooth, fluid look. Being rough, dull, splotchy or striated might indicate lower-quality metal, or it can mean that the metal has changed properties from age or use. Stainless steel is least effective at resisting rust when its surface is frequently abraded, such as a clevis pin securing the articulating parts of a boom gooseneck. This is also the case when the surface is deprived of the oxygen necessary to form a protective layer, such as bolts passing through a chainplate and bulkhead.
Have a 10x loupe to amplify what you cannot see well enough with eyes alone. Look for general surface smoothness, pitting and cracks. Light-orange rust is probably superficial, and is easily cleaned with white vinegar and a rag. Darker red and brown rust can indicate failing or failed metal.
Does the rust have a pronounced line or edge? This could be a crack, even if it’s not opened up yet. Photograph the area to note the date and condition. Then clean away the rust to assess surface problems. If rust reforms in the same areas within several weeks, the metal is not right and needs further attention.
Additional checks for rigging wire include looking for uneven gaps between the wire strands. Run your hand over the wire, feeling for any strands that are slightly raised. These can be broken strands, which might be hidden inside a swage fitting.
 Steering cables might be out of sight, but they should never be out of mind.
Behan Gifford
Understanding Alignment
Steering cables might be out of sight, but they should never be out of mind.
Behan Gifford
Understanding Alignment
Another thing to consider is alignment. It’s the relationship between the direction of a rigging load (force) and the orientation of the rigging component meant to carry that load.
Take a pencil, grasp each end, and try to pull the pencil apart. You probably can’t. Now secure half the pencil length to a table, with the other half extending past the edge. Push down on the overhanging end. It breaks easily.
The pencil is surprisingly strong when load is parallel to the length of the pencil. The more misaligned the load is to the length, the easier it is to break the pencil.
It’s the same concept with rigging. Chainplates should be shaped and oriented to transfer load down the length of the metal and into the bulkhead. If the chainplate has an angle out of alignment with the shroud, then the metal flexes to pull it straight if there is enough load. The more it flexes, the weaker and more brittle the chainplate gets.
This was the cause of our J/35 dismasting. The T fitting at the top of the shroud was set incorrectly in the mast slot. The forced misalignment was too much for the metal, and it failed.
The most common misalignment I see on rigging is with toggles—the U-shaped linkage used at the bottom of every turnbuckle and numerous other parts of standing rigging. A toggle fitted over a chainplate is often wider than the chainplate. There is room enough that the toggle slides, so one side is against the chainplate. The other side, with a gap between it and the chainplate, is misaligned to the load. The rounded-end portion of the toggle (the bottom of the U) is stressed and flexed, ever so slightly. This cycle loading, coupled with the metal pieces scraping against each other and no oxygen, is a recipe for trouble.
Where the surfaces come together is a good place to look for dark-red or brown rust on the toggle. This misalignment is easily corrected by adding a few bucks’ worth of nylon washers to keep the chainplate centered within the U of the toggle.
A Sad, Common Tale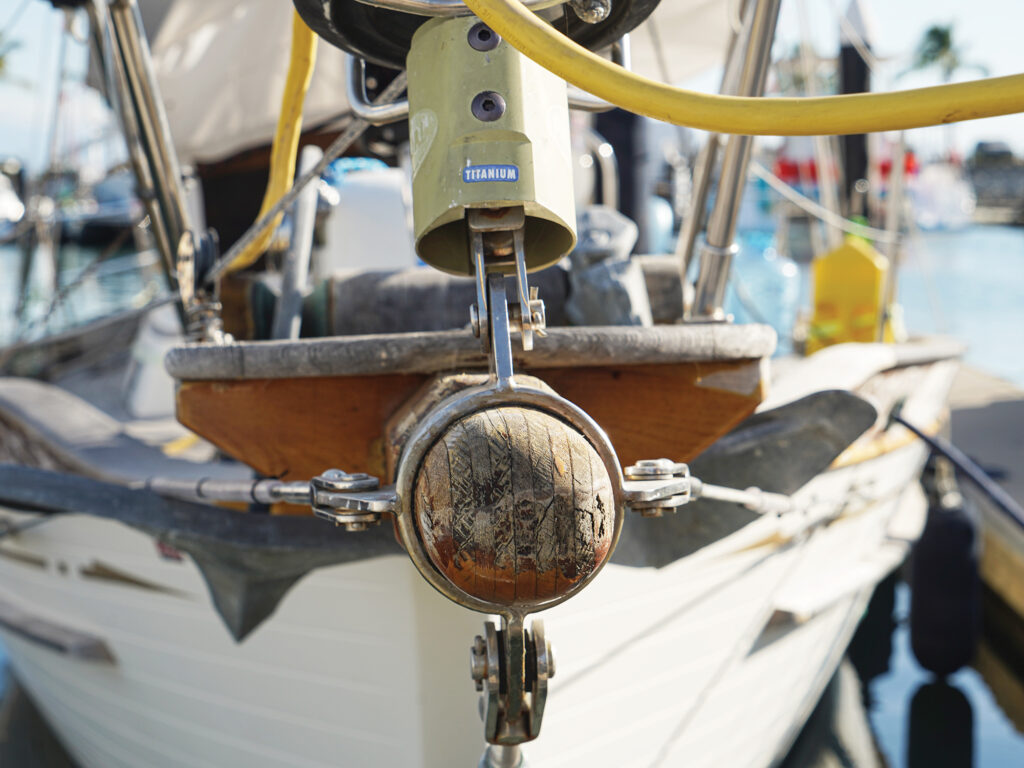 A misaligned and stressed toggle linking the headstay to the bowsprit cransiron.
Behan Gifford
A misaligned and stressed toggle linking the headstay to the bowsprit cransiron.
Behan Gifford
We did sail Totem to the South Pacific in 2010. In one year sailing between Mexico and Australia, I counted 15 boats that had dismasted along the way, and a few near dismastings. One occurred on friends’ Tayana 52 after the headstay chainplate sheared off at deck level on passage to remote Suwarrow in the Cook Islands.
Their chainplate was oriented fore and aft. After years of sailing with the wind force in the genoa pushing the headstay side to side, imperceptible flexing in the chainplate without structural support to counter the misaligned force weakened the metal to the point of breaking.
Fortunately, in that case, the inner forestay and a downwind sailing angle (where forces pushing the mast forward create less load on the headstay) were enough to support the mast through the midnight fire drill to reduce sail and destress the rigging. But the lesson remains the same: Try to spot and fix these problems before they reach this point.
As I write this, Totem is nearly ready to sail west across the Pacific Ocean again. Our 30-month refit has left much of Totem new, except the mast, which is original at 42 years old. The standing rigging is only four years young, but I’ll be aloft with my 10x loupe regularly in hopes of keeping the trip uncomplicated, as ocean crossings go.
The post How to Rig Everything in Your Favor appeared first on Cruising World.