How To Prioritize Your Sailboat’s Spring Checklist
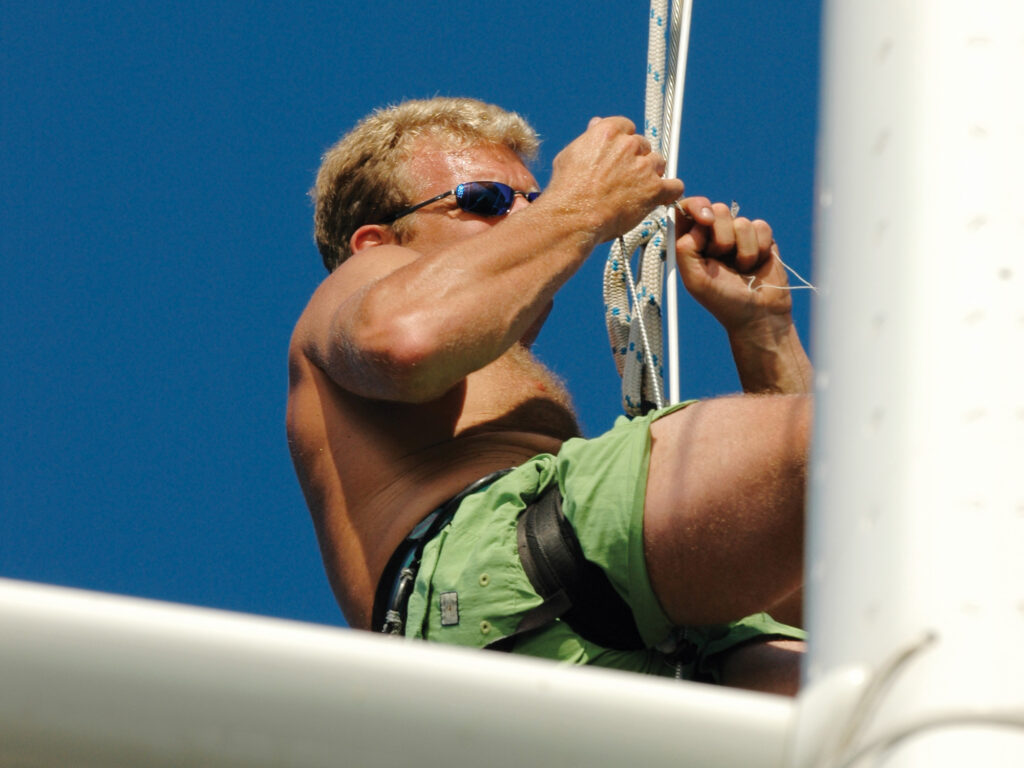 Safety techniques for going aloft vary from rigger to rigger. Most agree that a climbing harness is better than a boatswain’s chair.
Ralph Navarjo
Safety techniques for going aloft vary from rigger to rigger. Most agree that a climbing harness is better than a boatswain’s chair.
Ralph Navarjo
A countdown begins as soon as your boat’s seasonal launch date is set. The more experienced the sailor, the earlier it starts. For months before the first flowers bloom in springtime, sailors tackle major projects by rolling up their sleeves and hiring pros for installations, major engine work, and complex upgrades. The bottom is painted, and the operational checks are completed to make sure everything is in good working order.
Those are the key elements of a true spring commissioning—not adding an electronics network or deciding that the rudder needs replacing. It’s equally inappropriate to use this time only for cosmetic restoration.
Instead, spring commissioning should focus on ensuring systems reliability and seaworthiness. Varnishing the coamings and handrails can be shifted to the post-launch project list, but replacing a corroded, leaking through-hull fitting or a worn-out cutlass bearing must take precedence.
Bottom PaintBottom painting is synonymous with spring—at least for saltwater sailors who haul their boats each fall. Hopefully, the pressure washdown cleared away the fauna and flora, and the remaining bottom paint is well-adhered. If so, paint prep involves a minor amount of scuff sanding, which can be done the old-fashioned way: hand-sanding with 80-grit sandpaper.
This can be an arduous task, even with the whole crew participating. It’s ideal to rent a vacuum-extraction random orbital sander. This tool will maximize labor efficiency and minimize the airborne dust plume. In many parts of the country, drop cloths or full matting beneath boats is mandatory.
When it comes to working with antifouling coatings, keep the old paint residue, as well as the new coating chemistry, off your skin and out of your respiratory system. Gloves, coveralls, a hat and eye protection will go a long way.
Masking up is another priority. Disposable particle filter masks must fit facial contours, and it’s important to swap old masks for new ones regularly. Paint companies usually provide helpful details in their literature. In most cases, volatile solvents are the major concern. Avoid painting in confined spaces such as under a tented hull.
Paint selection depends on where you sail and how much of the year your boat spends in the water. For eco-friendly biocides, progress has been made in formulating super-slick coatings and paints that slough off along with the critters. In warm marine environments, Bryozoa have become a major bane to sailors. Some less-toxic bottom paints work on fast-planing powerboats, but slower-cruising sailboats are best served by hard or soft ablative coatings.
Unfortunately, more and more boatyards are prohibiting DIY bottom work. Some yards provide hauling and blocking, and still let clients immerse themselves in the DIY tradition. At other yards, make sure to get a firm quote for what the yard will do, what paint will be used, and the number of coats. Also seek out feedback from friends who have used the service.
TopsidesGelcoat is an unsung hero in fiberglass-boat building. It can weather a decade of abuse from the elements with a minimal amount of maintenance. Fastidious sailors use compounds, polishes and waxes to further extend the gelcoat’s life span.
At its core, gelcoat is a specialized resin that’s sprayed onto the hull mold. As the polymerization process unfolds, solvents leave the gelcoat via the inner surface (the side farthest from the mold). This process ensures that the layer against the mold develops into a glossy, much-less-porous stain-resistant outer skin.
Excessive use of overly abrasive compounds removes too much of this hard outer layer. A good way to renew gelcoat gloss is to begin with a freshwater wash to dislodge loose grit. Follow up with a sponge, soft mop, or other nonabrasive scrub with a mild boat soap or dish detergent. The goal is to clean away grit without resorting to scrub pads and harsher detergents.
Once this initial washdown is complete, note where the challenges lie. If there are rust stains, don’t attempt to scrub them away. Instead, use an oxalic acid gel to remove the rust stains chemically. In areas that appear greasy and sticky, try hot water with boat-washing detergent. If necessary, use Goo Gone, followed by a wash and rinse.
Newer gelcoats respond well to nonabrasive gloss-restoration products. For the first few years, waxing and buffing after a thorough washing is all it takes. If you use a power buffer, avoid high rpm rotation that can overheat and damage the gelcoat.
The longer you can avoid the use of abrasive compounds, the better, but the day will come when oxidation leaves the gelcoat chalky, and the next step is to compound the surface with as fine a grit as will do the job. This restorative effort results in a satin-finish look.
Eventually, the oxidation and compounding cycle removes too much gelcoat, necessitating a topside face-lift, usually in the form of a linear polyurethane paint job.
Rigs and RiggingBefore there were Travelifts and Brownell boat stands, sailboat storage involved stepping and unstepping the mast annually. The cost savings of mast-stepped storage is significant, but spars and rigging do not always get the scrutiny they deserve. This is why the spring-commissioning agenda should include a top-down rig and rigging inspection.
Going aloft safely involves techniques that vary from rigger to rigger. Most agree that a climbing harness is better than a boatswain’s chair and that the skill of the crew handling the halyards on deck is important.
Spring commissioning should focus on ensuring systems reliability and seaworthiness—not adding an electronics network or replacing a rudder.
Focus on components that hold up the mast, and on the running rigging used to set, furl and trim sails. Most inspections start at the masthead and work their way down to the deck. The process includes scrutiny of cotter and clevis pins, and a search for chafe and corrosion around halyard sheaves.
Also look for halyard wear, especially near the roller-furling headsail’s top swivel. While aloft, test the navigation lights and wind instruments.
During your slow descent, take a close look at spreaders and their mast-mounting hardware. This quick rig check is not as revealing as an unstepped-mast inspection would be, but it does offer a chance to catch and remedy potentially serious problems.
Overall, a successful spring commissioning means there’s no water accumulating in the bilge, the helm is responsive, and a dozen or so other key operational attributes continue to function as designed.
The post How To Prioritize Your Sailboat’s Spring Checklist appeared first on Cruising World.